Introduction
MacBook keyboards, renowned for their sleek design, sometimes require maintenance—especially when keys malfunction or face debris accumulation. Knowing how to correctly remove and reattach the keys is essential for effective maintenance and longevity. In this guide, we’ll walk you through a straightforward process to safely take off MacBook keys, offering insights that will ensure your keyboard remains in top condition.

Understanding MacBook Keyboard Mechanisms
Before diving into key removal, it’s important to understand the different mechanisms used in MacBook keyboards over the years. This knowledge will assist you in choosing the correct removal technique and avoiding damage.
Apple has used two primary types of key mechanisms: the butterfly and scissor switches. The butterfly mechanism, prevalent from 2015 to 2019, is known for its minimal key travel but has faced durability issues. In contrast, the scissor mechanism, reintroduced in the Magic Keyboard models after 2019, provides more key travel and dependability. Identifying your keyboard type is crucial before proceeding with key removal steps.
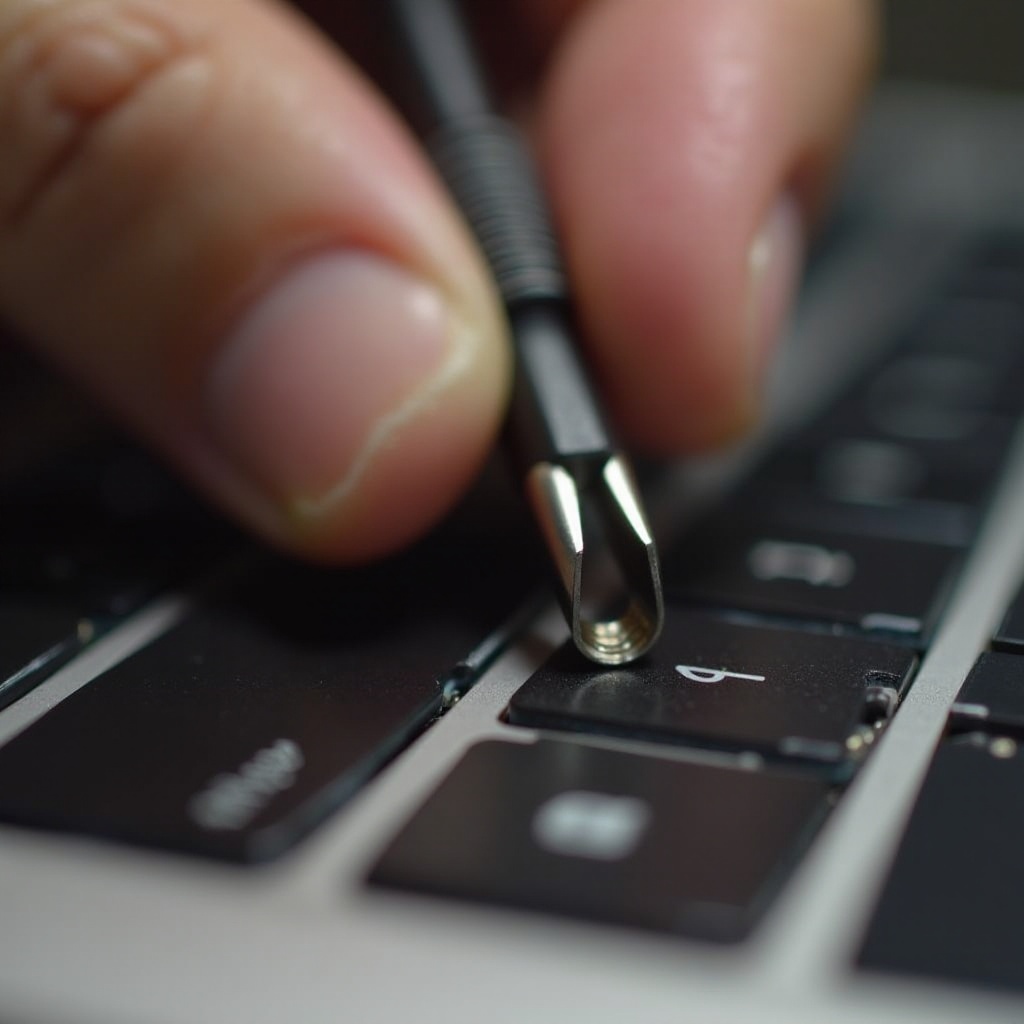
Preparing for Key Removal
Proper preparation is a pivotal step in ensuring successful maintenance. Start by gathering all necessary tools to make the process smooth and safe. Here’s what you’ll need:
- A small flathead screwdriver or a spudger tool
- Compressed air for removing debris
- A microfiber cloth for cleaning
Make sure your MacBook is powered down and unplugged to avoid any electrical hazards. Create a clean, well-lit workspace where you can keep track of small parts during the process. With these preparations in place, you’re ready to proceed to the actual key removal.

Step-by-Step Guide to Removing MacBook Keys
Once prepared, follow these detailed instructions to remove keys from your MacBook safely, customized by model.
- Removing Keys from Older MacBook Models:
- Gently insert the flathead screwdriver under the edge of the keycap.
- Apply minimal pressure to lift the keycap until it pops off.
-
Be cautious of the retention clips attached to the keycap.
-
Removing Keys from Butterfly Mechanism Models (2015-2019):
- Use a spudger tool to carefully pry up the top edge of the keycap.
- Apply slight pressure towards the bottom edge until the keycap releases.
-
Take note of the butterfly clips that may be sensitive.
-
Removing Keys from Magic Keyboard Models (Post-2019):
- Slide the tool under the keycap edge gently.
- Tilt the top edge of the keycap upward to release it.
- Handle the scissor mechanism beneath with care.
These specific steps are designed to help avoid unnecessary damage to your keyboard during key removal.
Cleaning and Maintenance After Key Removal
With the keys removed, now is the ideal time to clean the exposed areas to maintain your keyboard’s performance. Use compressed air to blow away any particles or debris caught beneath the keys. Next, delicately wipe the area with a microfiber cloth to remove dust or residue.
Regular cleaning as part of your routine maintenance can prevent the accumulation of debris that damages functionality, ensuring your MacBook keyboard continues to operate smoothly.
Reattaching Keys Correctly
With cleaning complete, proceed to reattach the keys to restore your keyboard’s functionality. Here’s how to do it effectively:
- Align each keycap with the mechanism on the keyboard.
- Press down gently on the keycap until you hear a soft click, confirming it’s securely attached.
- Test each key by tapping it to ensure they feel normal and register input when pressed.
Reattaching the keys correctly is crucial for maintaining the tactile response and overall performance of your keyboard.
Common Issues and Troubleshooting
Sometimes, despite best efforts, you may encounter issues. Here are solutions for the most common problems:
- Stubborn Keys: If a key doesn’t detach easily, double-check the removal method relative to your specific MacBook model to ensure you’re using the right technique.
- Key Malfunction After Reattachment: If a key fails to work after reattaching, inspect its alignment with the switch mechanism and verify it’s fully clicked into place.
Addressing these issues promptly helps in maintaining optimal keyboard performance and extending your MacBook’s lifespan.
Conclusion
Mastering the removal and reattachment of MacBook keys can greatly benefit any user, allowing you to maintain your device’s efficiency and longevity. Remember to handle your keyboard with care and conduct routine maintenance for the best results. With the correct techniques, your MacBook’s keyboard will remain in excellent working order, supporting your daily tasks seamlessly.
Frequently Asked Questions
Can I remove MacBook keys with just my fingers?
While tempting, using proper tools is safer and reduces the risk of damaging your keys or keyboard.
What should I do if a key doesn’t reattach properly?
Ensure it’s aligned with the switch mechanism and fully clicked into place. Retrace your steps if necessary.
Is it safe to remove keys from a MacBook still under warranty?
Yes, but proceed with caution. Contact Apple Support if unsure to avoid voiding the warranty.